
WooCommerce Multistore Documentation
Thank you for your purchase.
If you have any questions after reading through this page, please feel free to open a ticket.
This documentation page is to be used if you are running separate WordPress installations.
If you are running WordPress multisite, please check our documentation on how to set up WooMultistore for WP multisite. If you aren’t sure which version you have you can safely assume that you have separate WordPress installations. If you are curious what the difference is, check out our FAQ.
1) Plugin Pre-requirements – Top↑
You must have at least two WooCommerce stores setup before you can install the plugin.
2) Plugin Install – Automatic Installation – Top↑
The plugin can be installed just like other plugins. Complete the following steps to complete the process.
- Log in to your WordPress site admin.
- Go to Plugins –> Add New
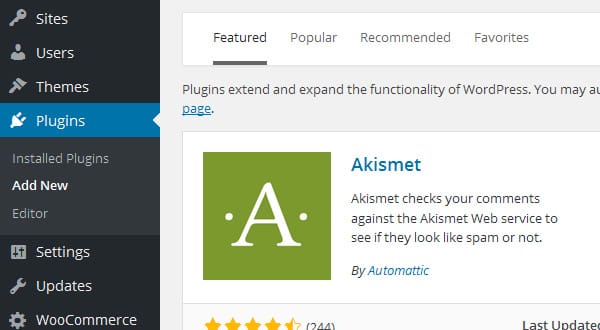
- Choose Upload (near the top of the page).
- Click browse and select the zip file for WooMultistore.
- Click Install Now.
- Choose Activate Plugin once the message appears saying the install is complete.
3) Plugin Install – Manual Plugin Installation – Top↑
You can also manually install the plugin. Use the following steps if you prefer to control the full installation process.
- Download the archive to your computer.
- Extract the Plugin files and folders to your desktop, or to a folder of your choice.
- Using your FTP program, upload the Plugin folder to the wp-content/plugins directory in your WordPress online instance.
- Go to the Admin Dashboard, access the Plugins page, then locate the uploaded WooMultistore in the list.
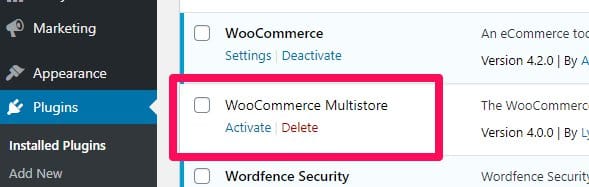
- Click Activate Plugin to enable the code.
4) Basic Description – Top↑
The plugin makes it easy to manage and publish products across several WordPress WooCommerce stores using sub-domains, sub-directories, or different domains. The stock management is present by default, but global stock management can also be turned off. Here are a few of the plugin’s main features
- Any product can be replicated across the network, making it available on any or all of your stores. This ensures the information is consistent across your different stores. You can replicate single products or replicate products in bulk.
- A unique product stock management makes it easier to conduct inventory evaluation.
- Product management is available on the main product and site. You can also update or adjust product data on other sites. Decide if you want the replicated product to be synced to update with the main product.
- You get a main WooCommerce Orders page that displays all orders from all stores.
- All product meta-data can be exported to other stores, including content imagery, galleries, and featured thumbnails.
- Sync any WooCommerce product type.
5) Setup Wizard – Top↑
After you install and activate the plugin, a Multistore menu will appear. Click on the Setup Wizard under the multistore menu.
Video: How to install WooMultistore in the main site and connect a child site (turn on sound)
The complete explanation follows the video.
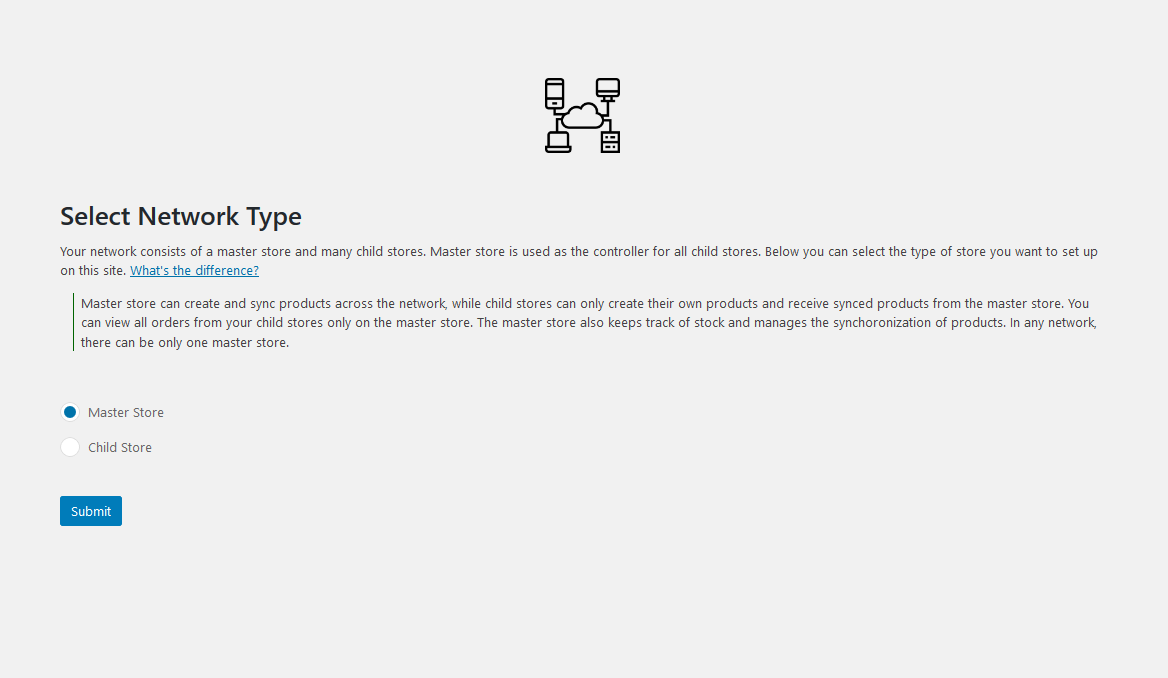
a) Select Network Type
Your site consists of a master site and its child sites. The site from where you will control things like product publishing and stock synchronization is your master site. Other sites you create are the child sites.
– If you are just getting started and need to create the main site, highlight it and select the type Master Store.
– If you are connecting a child site, select the type Child Store.
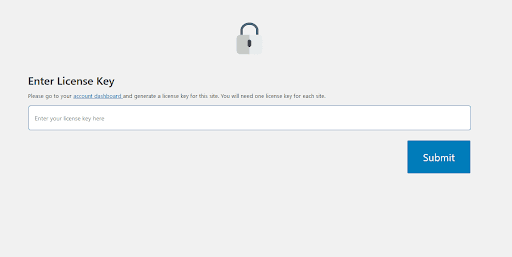
b) Enter the License Key
Follow the directions on the screens to enter the license key. Your license key will be sent along with your order email.
If you prefer, you can generate it from your account on woomultistore.com. Go to Orders > License Manager. Once you’ve entered it, the plugin will be activated.
Please note that this is the only place you will enter your license key; you will not enter the key on your child sites.
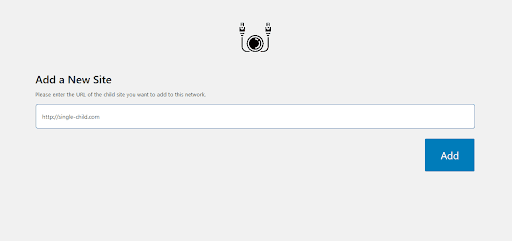
c) Connect each of your Child Sites
Verify that you installed the plugin on your second site and set it up as a child following the steps under step (a).
– Go to the master site and navigate to Multistore > Sites > Add.
– Enter the site URL of your child site.
– Press Add.
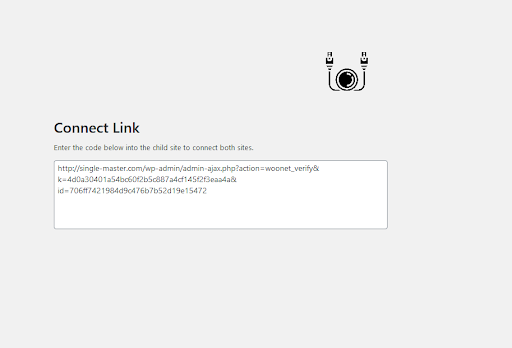
d) Connect Link
The connect code automatically generates after you complete the previous step.
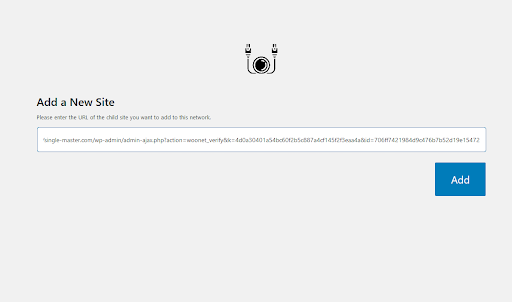
e) Add the Child Sites
You will need to establish each child site.
– Go to Setup Wizard > Connect to Master Site.
– Enter the connect code.
– Press Add.
f) Connected to the Master Site
If your sites are successfully connected, the following screen displays.

Complete these steps to setup all of your child sites to make sure everything is connected.
After you complete all of these steps for your master site and all of the child sites, you can start to sync products. To sync your stores, following these instructions.
6) Settings Page – Top↑
On the settings page of the main site, you can select stock to be synced across all shops. If you decide to select No for this setting, you will still be able to sync single products at the single product view.
- Determine if sequential order numbers will be applied across all shops.
- You can set your custom taxonomies and custom metadata to sync across stores.
- Determine the minimum user role to be able to distribute products to other shops. There may be times when you don’t want shop owners to be able to distribute to other shops.
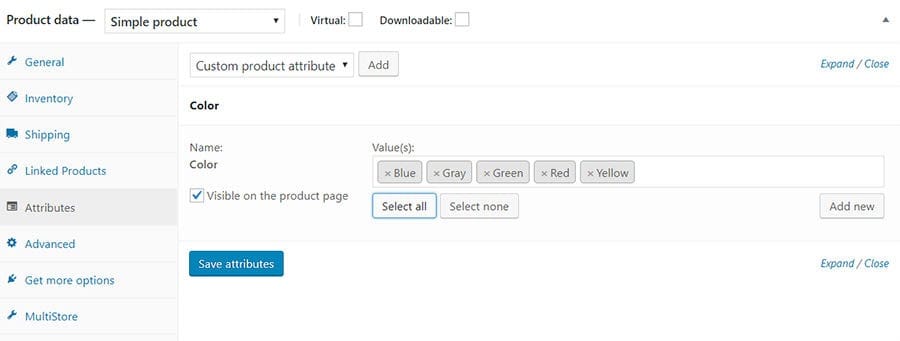
- For each store you can chose what you want to sync, including Statuses, Catalog visibility, Product title, Description, Short description, Prices, SKU, Tags, Attributes, Default Form Values (default attributes), Product image and image gallery, Reviews, URL (product slug), Product purchase note, Shipping class, Backorders, Upsells, Cross-sells, Categories, Category images, Category descriptions, Category metadata, API sync, Stock sync on/off, Variations, Variations data, Variations status, Variations stock, Variation SKU, Variation prices.
See the image below for sync options.


7) Network Dashboard WooCommerce Orders – Top↑
Orders are created in each store when a customer completes the checkout process. From here, purchases can be handled by a shop owner. The plugin also provides a unique interface through which all stores’ orders can be viewed, managed, and processed by the network admin (the administrator of the main site).

The interface is available within the WordPress Dashboard of the main site under the Multistore menu. This uses the same style as a default WooCommerce Orders area.
8) Network Dashboard WooCommerce Products – Top↑
From the Main Products page, products can be published to any shop. This provides a single place to easily manage products from all network shops. Additional information is displayed to simplify the identification things like the product type and the MultiStore status.
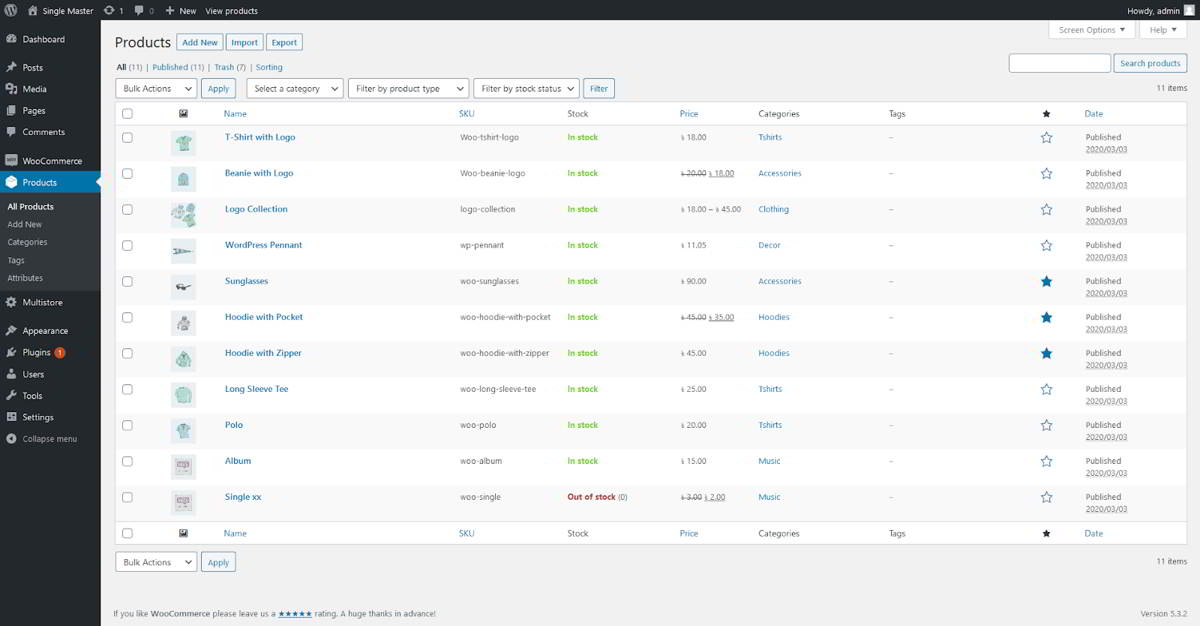
The interface is available within the WordPress Dashboard of the main site under the Multistore menu. This uses the same style and functionality as the default WooCommerce products area, including things like actions and filters. The plugin also includes the option to use the Shop Products filter to display only products from a certain shop.
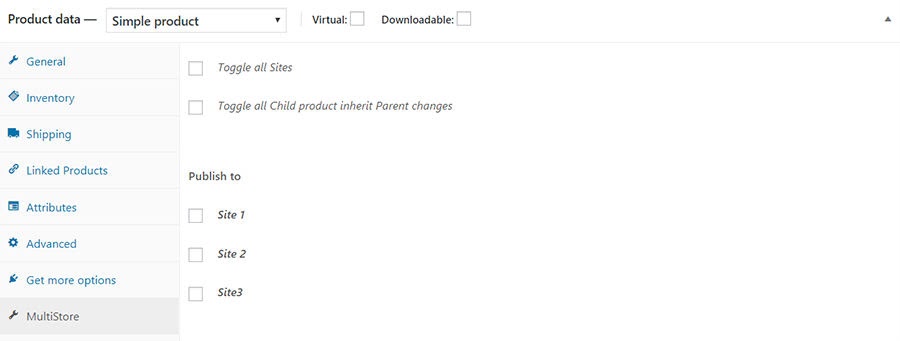
9) Product Network Publish – Top↑
The product network publish functionality is incredibly simple using this plugin. Any product can be published to any other store. The product edit page includes several important functions;
- MultiStore tab
- Other stores connected to the network
- Details other sites where the product has been published
Any network published products are maintained through the original products, changes for things like the descriptions, prices, images, and shipping classes are automatically applied to already published data.
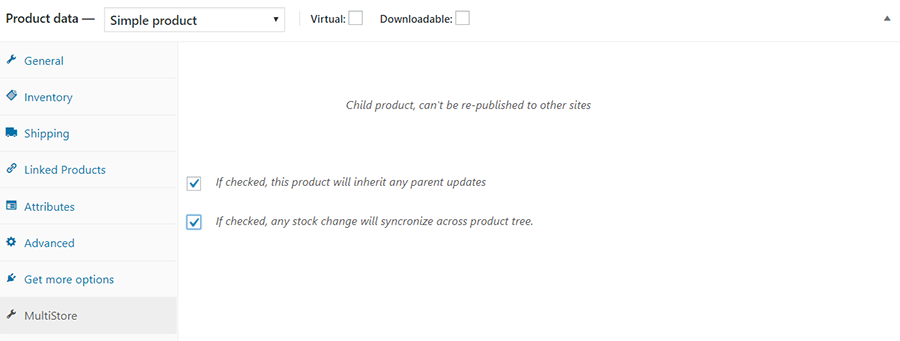
Unchecking the above checkbox allows changes on the product to be preserved after any network updates. You can do this from the main network product page by unchecking the store where the data was pushed.
The following are some of the functions you can set from this page.
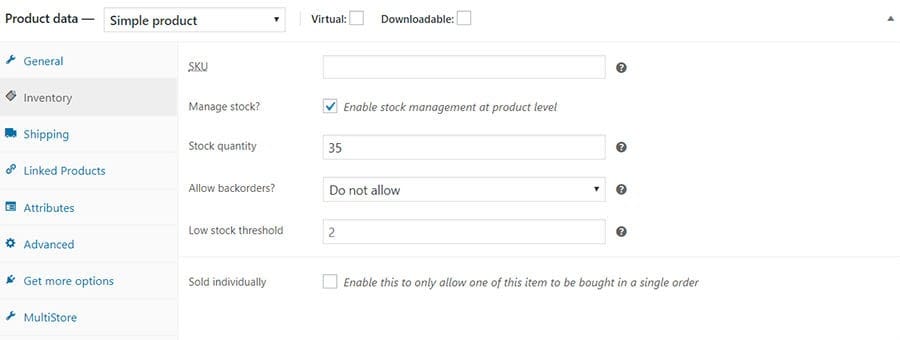
- The Unique Stock function is an improvement for network published products, which ensures that the fields stay the same on any store, depending on where the order was placed.
- This is available for stores that use the Enable Stock Management
- Sync Stock can be applied individually depending on how you’ve setup each store.
The plugin maintains the following functions:
- Maintains product categories
- Tags synchronization
- Custom taxonomies
- Shipping classes
- Attributes
- Variations
10) Order export – Top↑
The Order Export feature lets you export orders then download those exported order files. The plugin offers a fully configurable export function, letting you choose what you want the export to include:
- File format
- Order dates
- Order status (including any custom order status)
- Site filter (select all the shops or only the required shops)
- Row format (row per order or row per product).
- Select export fields (select desired fields and sort them by dragging and dropping before export)
